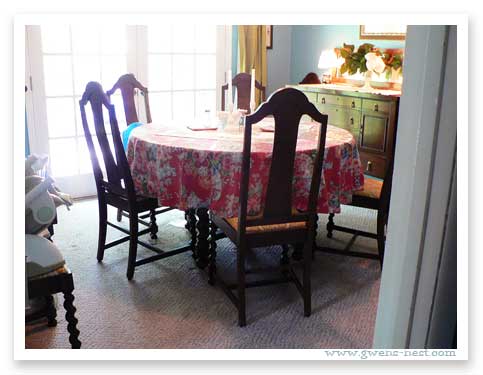
What I do not love about this room:
carpet.
Who carpets a dining room!?!
This seriously drives me bonkers. And we’ve recently dealt with it…you’ll get a sneak peek in this post. I feel like I won the hardwood floor lottery! After enjoying the ‘new’ old floor for a few days, I started getting a hankering to deal with the other issue I have with this room.
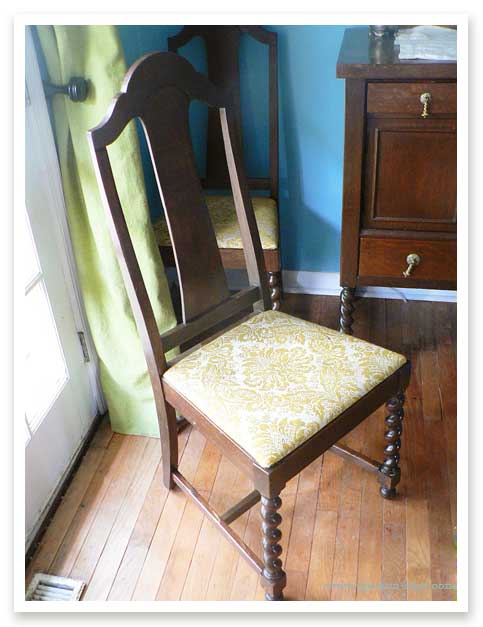
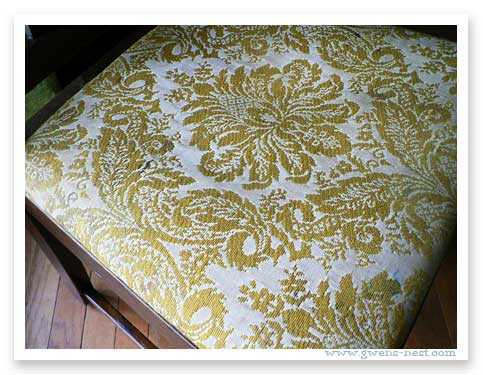
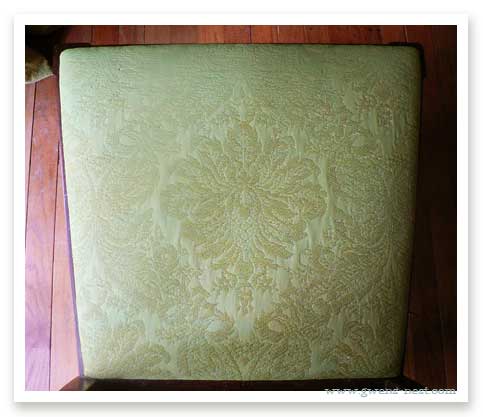
The other thing I do not love: the goldenrod and white 1960’s brocade on the seats of the chairs.
Eesh.
The pattern is great. The goldenrod is just too…goldenrod for my taste.
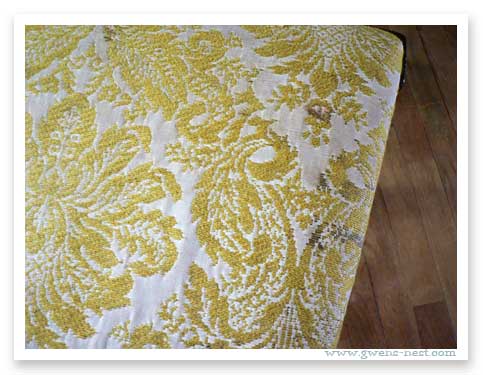
And dirty. These stains, are the result of it being the family dining table, both for her family and mine, lo these many years. So it’s sentimental dirt. But it’s still dirt.
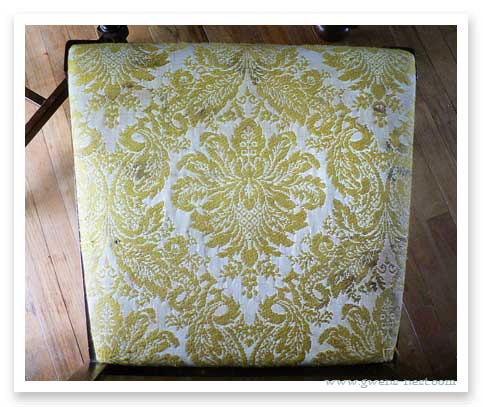
I actually really love the pattern of the brocade, and the seat covers were done professionally. It’s mainly just the stains and color combo that I’m not loving.
The whole time, I’ve been thinking about recovering them, and adding clean plastic over them. Yuck, I know…but when kids are in the picture, it makes cleaning that much easier.
Then I was browsing about on Pinterest, and saw this post about a painted wingback chair.and my wheels started turning.
I waited a stunning 48 hours, silently…not revealing my ideas and intentions to my hubby. With every good intention. He already questions my sanity about many things, so no need to fuel that fire, right?
My thoughts were as follows:
- I really like the design of the fabric, and so did his grandmother.
- Worst case scenario, I will just follow through with the recovering.
- Only our bums touch the seat fabric, so no big deal if they turn out stiff and weird feeling.
- They may even be easier to clean if the fabric is sealed by the paint.
- Touchups will be easy if I just keep some paint on hand.
- It’s a $4.00 project, at most.
- It’s easier to ask forgiveness than permission.
- What are we waiting for???
So, after 48 hours, I rushed out and bought four .99 bottles of green craft paint, and the kids and I had a painting day!
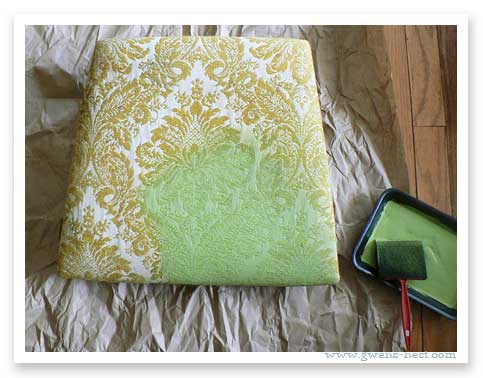
I know a girl who uses regular craft paints to make custom painted
clothing. She’s done it for years, and it washes nicely and is better
than fabric paints. So I felt totally comfortable using it for my
painted chair cushions. So I skipped directly to the final paint application, with great results.
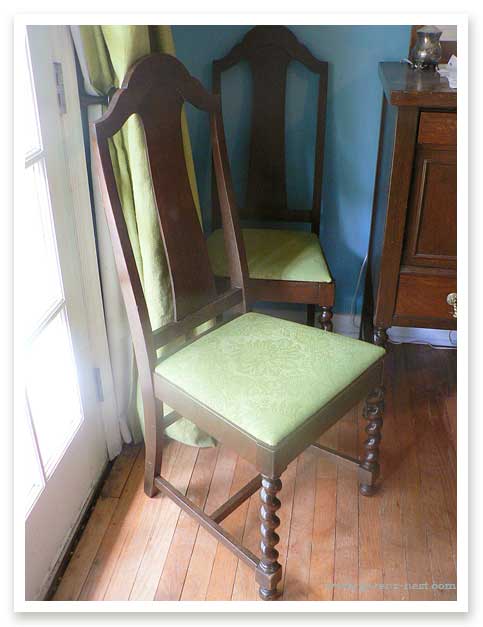
This is our final result:
sorry about the blurry photos…after I took them I discovered tiny smeary fingerprints on the lens.
The big reveal was less than stellar with my hubby, as he got home a bit early and discovered us *PAINTING* his grandmother’s chair cushions.
Oops.
After stewing about the house mumbling things like ‘fabric should be dyed,’ my man finally got cozy with the new/old green chairs seats. He is giving me glowing feedback, such as, “They’re OK.”
And as we all know, in man language, that means, “I love them.”
See!!! All’s well that ends well, right!
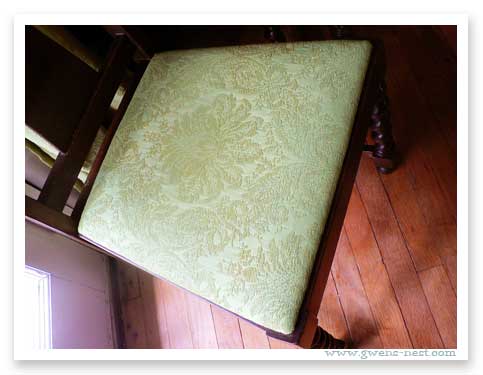
The final verdict on the fabric texture is that it is only *slightly* stiffer
than before, but it was pretty stiff fabric to start out with. It’s not
really a noticeable texture change on a heavier fabric, in my opinion. I won’t be painting my velvet duvet though…and I probably wouldn’t
use this treatment on fabrics that are supposed to have a soft feel to
them. I’m very texture/comfort oriented, so I know that would be a big
deal to me.
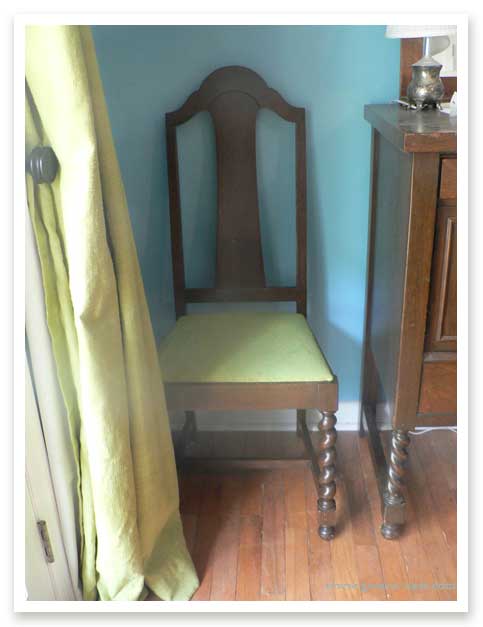
It really does give a fresh, new feel to the whole room.
What do you think?
Would you do something this crazy? And if so…I wanna see!!!
UPDATE: Over a year and a half later, my man finally admits that this is a big improvement over the original goldenrod. Mainly because the paint is much more washable than the original fabric…the dirt sits on top, and it wipes clean. There are a few spots that have worn through from age (the fabric is 50 years old). But that’s easy enough to touch up with some glue and paint. Eventually, I will recover the chairs, but this has been a VERY worthwhile project that I’d do again in a heartbeat!

It is easy to recover chair cushions like that. I did all 8 on my Craigslist freebie dining set in about 2 hours.
Yep! After several years with this treatment, I’m ready to recover them. Just looking for the right fabric and a block of time. 🙂 I’ve been very happy with how the painted fabric has held up though. They wipe clean and are comfy! We’ve just worn through some spots on the old ’60’s fabric. It’s just time.
I did this same thing with my kitchen chairs. I used the inexpensive acrylic paint as well, and I also mixed some fabric medium with it. Worked beautiful, and still looks brilliant after 2 years. I love the fact that crumbs, liquid, anything..sits on top!
LOVE the idea of painting the chair fabric and facinated that it actually worked! Love the after photos.Great job!
I love how you’ve decorated your dining room. Ours look a lot like that too, with this old farmhouse of ours. 1919 was when, this house was built, so that’s why I love to decorate to go with the era of it. I would do our old dining room seat cushions like that too, if they were in the original fabric, but we bought this set off Craigslist, and they were already recovered in a black faux leather, and they have weathered well. I’ll have to bookmark this and keep it in mind, if I ever need to re-do ours. Thank you for sharing!!
I ***dream*** of an old farmhouse. Old architecture is my love language. 🙂 Hope you get a chance to use this idea! It’s weathered well here…the fabric is literally starting to fray off of the chairs in spots (read: the chair my six year old sits in), but the painted finish has held on really well! And they’re more wipe-clean than they were before. 🙂
You have totally lit my fire. I am starting tomorrow chalk painting my dining room table and chairs. The chairs have cushions, cushions that I have recovered four times in the last 20 years. It’s really hard and I just don’t feel like doing those again. So I looked up painting fabric cushions. YESSS, this is the answer. However, I’m wondering, should I paint chairs first then cushions, or cushions first, then chairs? I am a widow now, do not have an electric screw driver nor do I want to go purchase one. So the cushions stay onon this process. What’s your advice? Thank you. And by the way, your chairs look amazing as well as that room.
Melissa
Thank you, Melissa!
For your project, I’d probably paint the cushions first, and tape off the wood. Then let them dry completely, and tape off the cushions and paint the chairs last. Reason being: I think it will be easier to touch up the fabric and less likely for the paint to peel off of the fabric with the tape. 🙂 Best of luck!